What Are You Looking For?

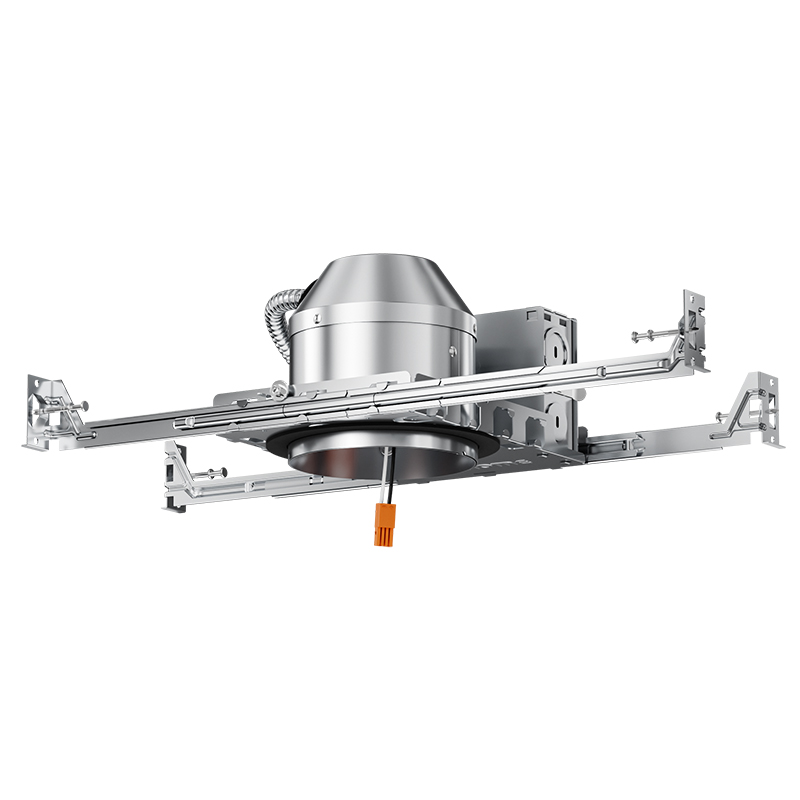
4" New Construction Recessed Light Housing
Shallow New Construction Housing for Professional Installations.
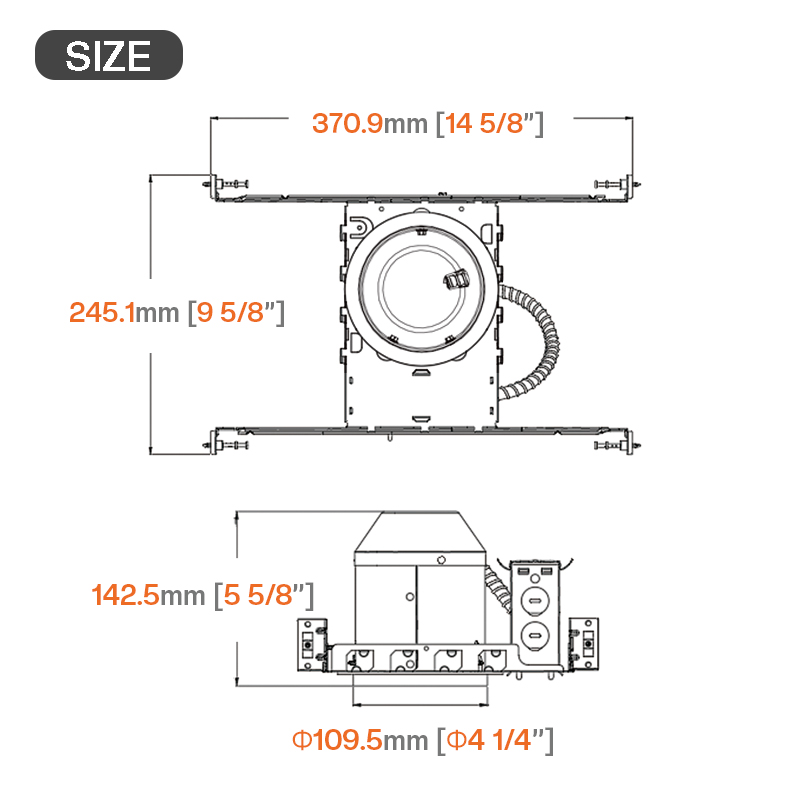
Space-Saving Design: A compact 4-inch housing for new construction ceilings with limited installation depth.
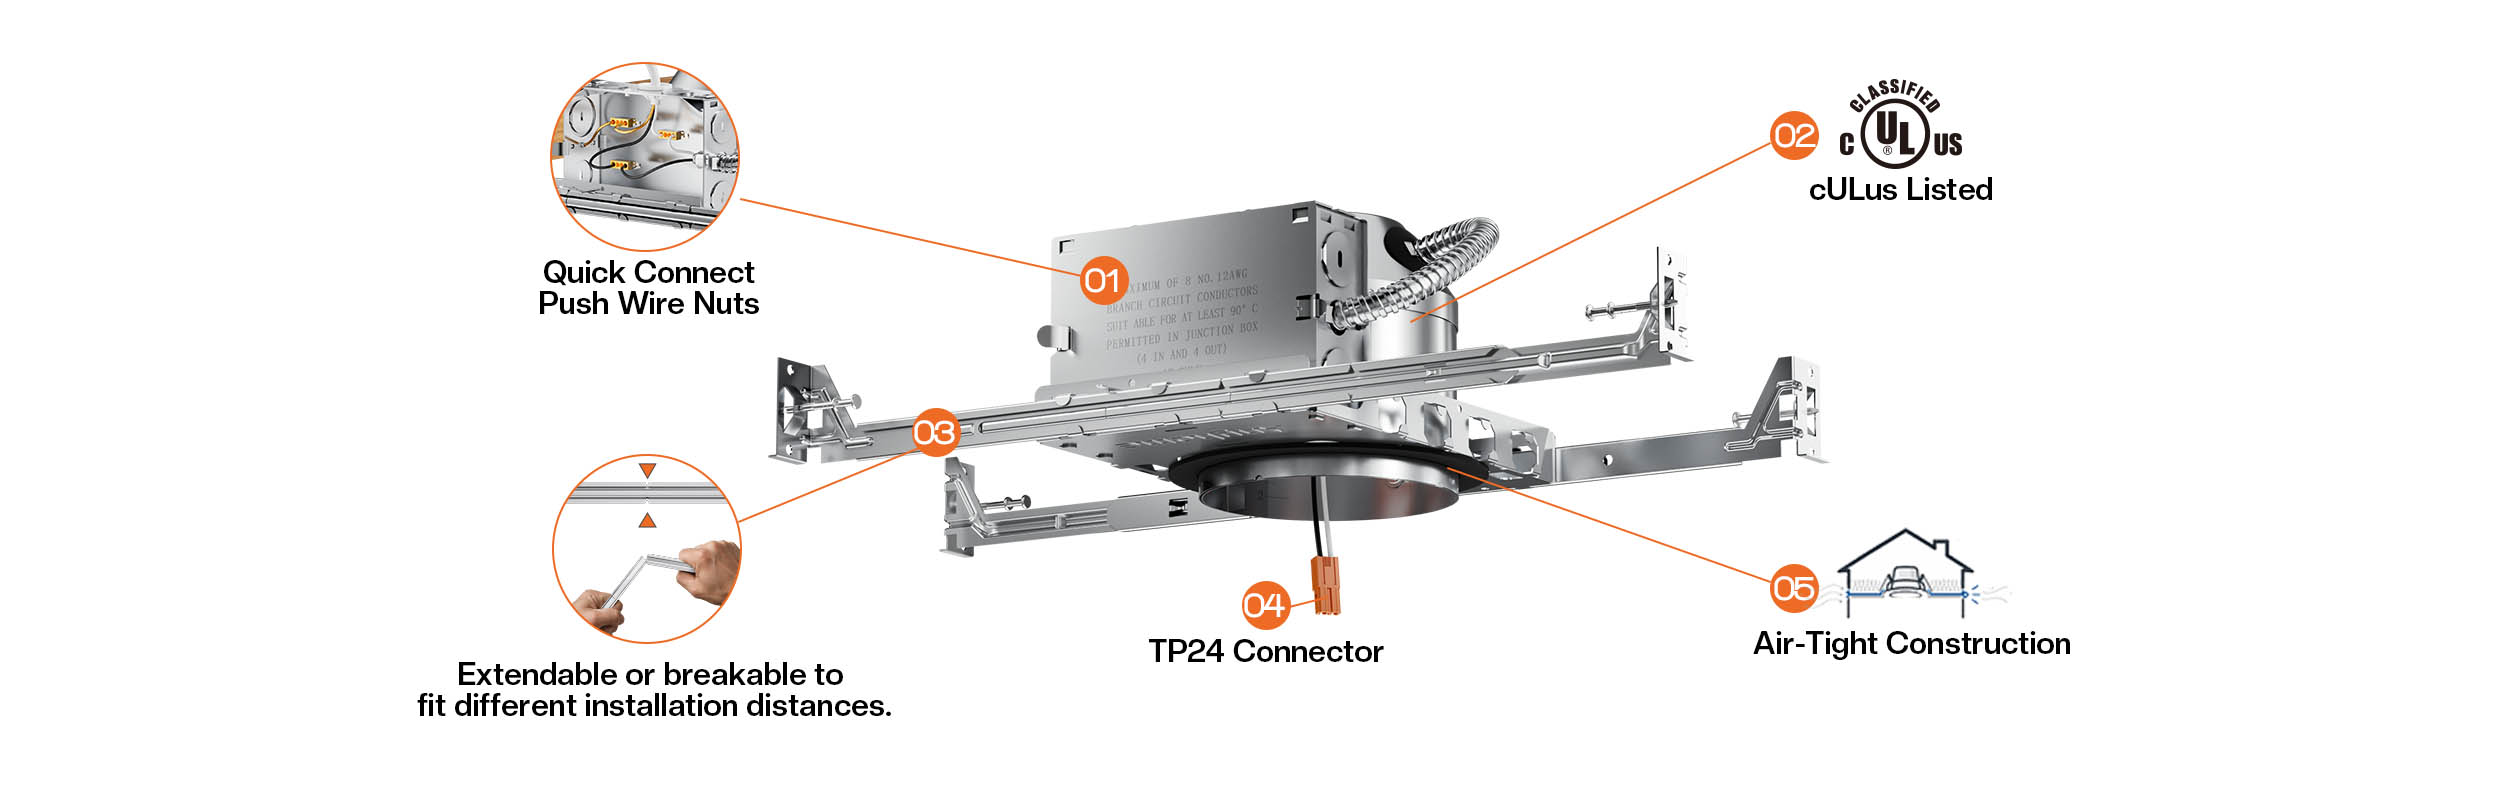
Efficient Wiring: TP24 connector and quick connect push wire nuts simplify rough-in connections.
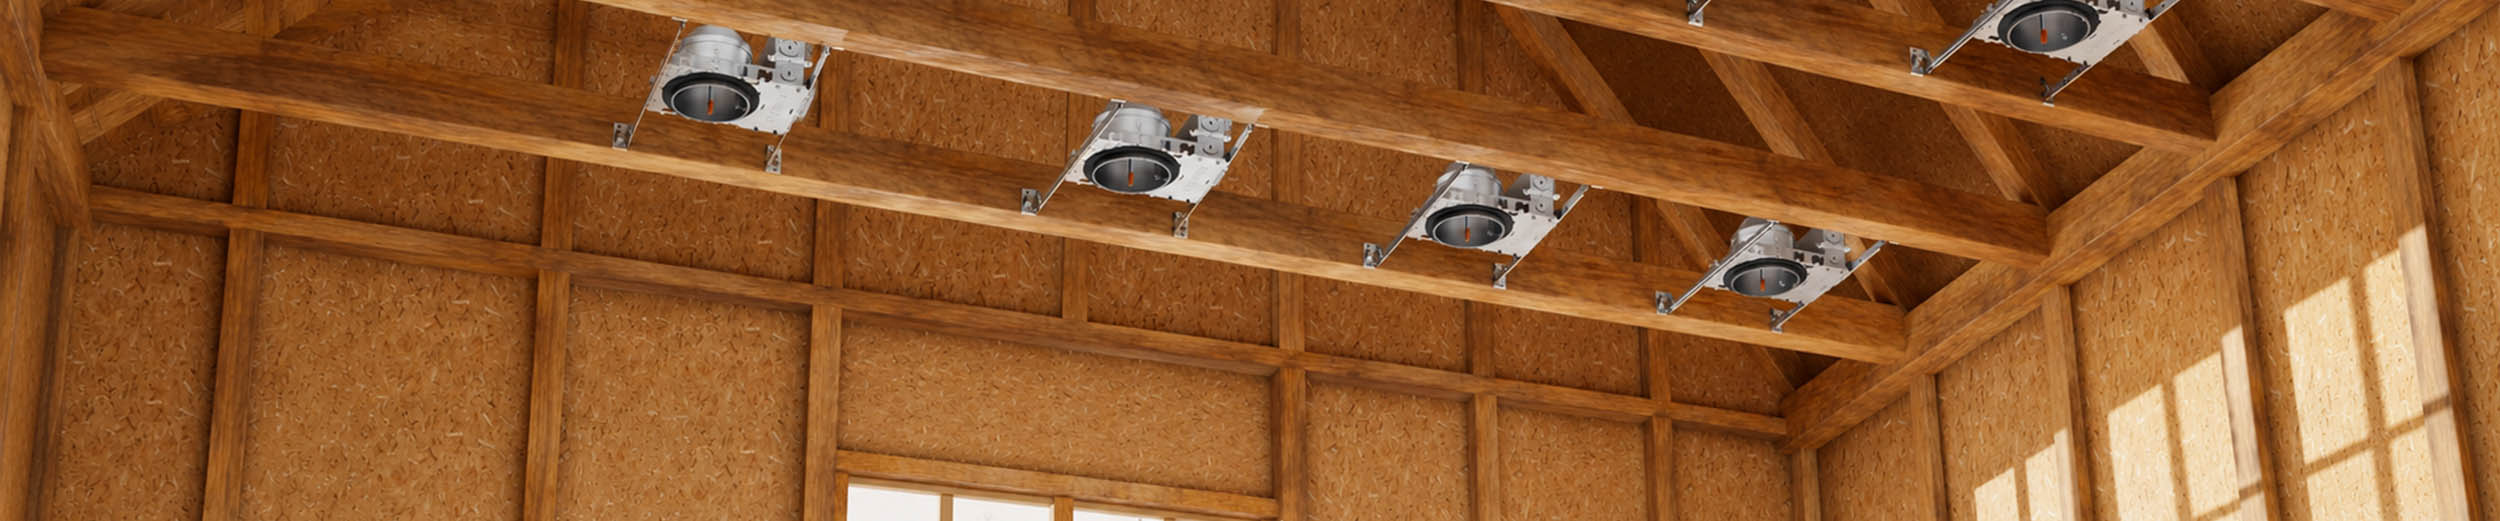
Flexible Applications: IC-rated design for insulated ceilings in residential, multifamily, retail, office, and hospitality projects.
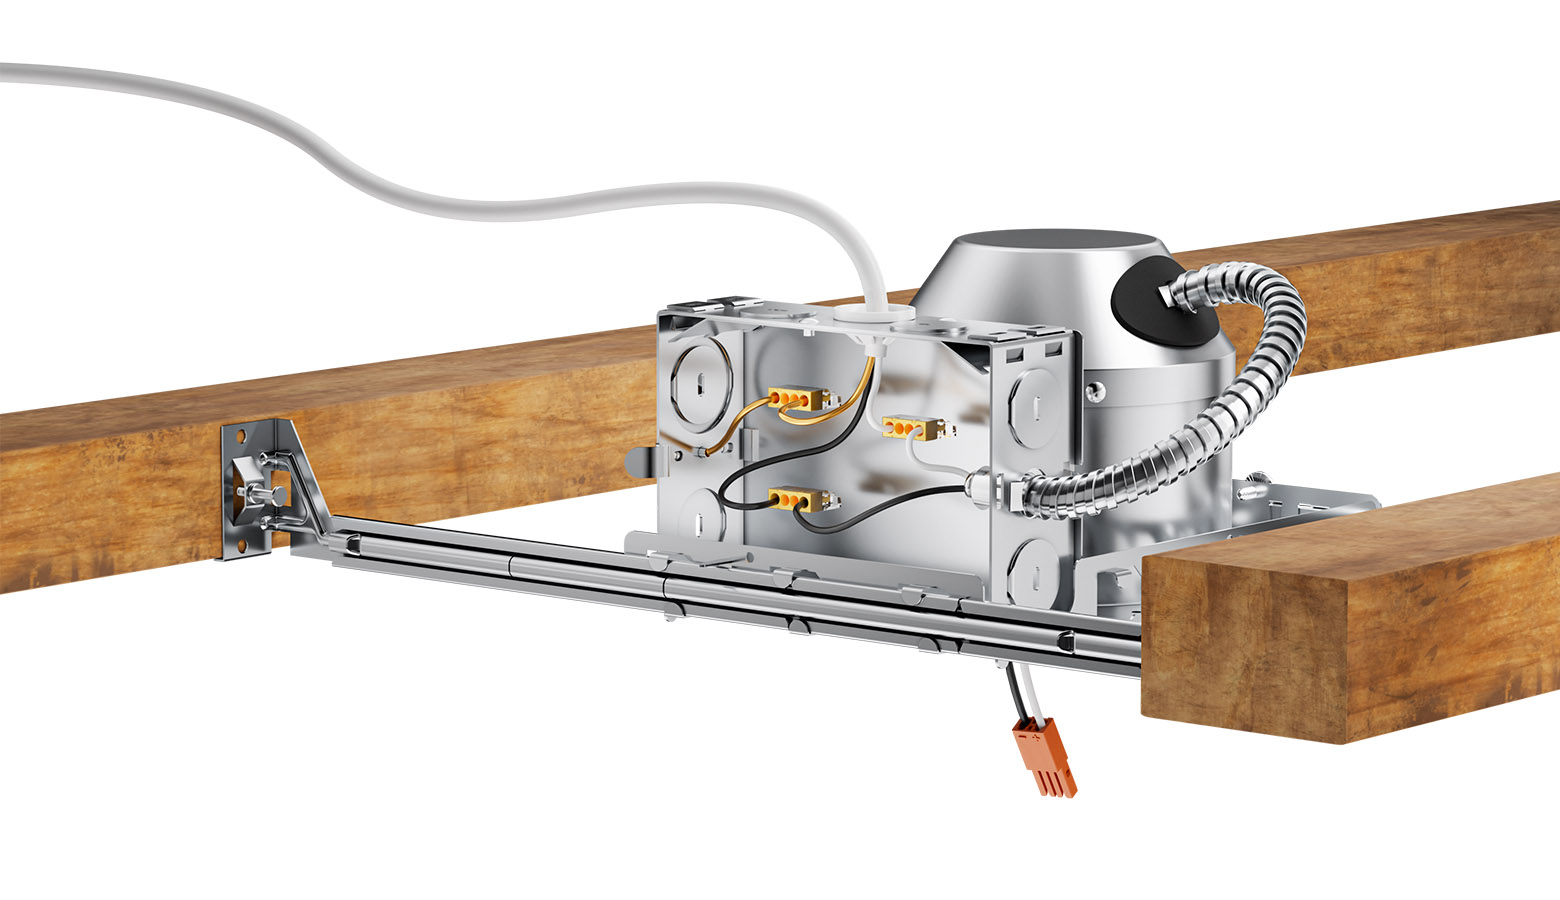
Quick Connect Push Wire Nuts
The integrated quick connect push wire nuts help contractors make faster, cleaner electrical connections during installation. The push-in wiring design reduces connection steps at the junction box and supports a more efficient rough-in process for new construction recessed lighting projects.
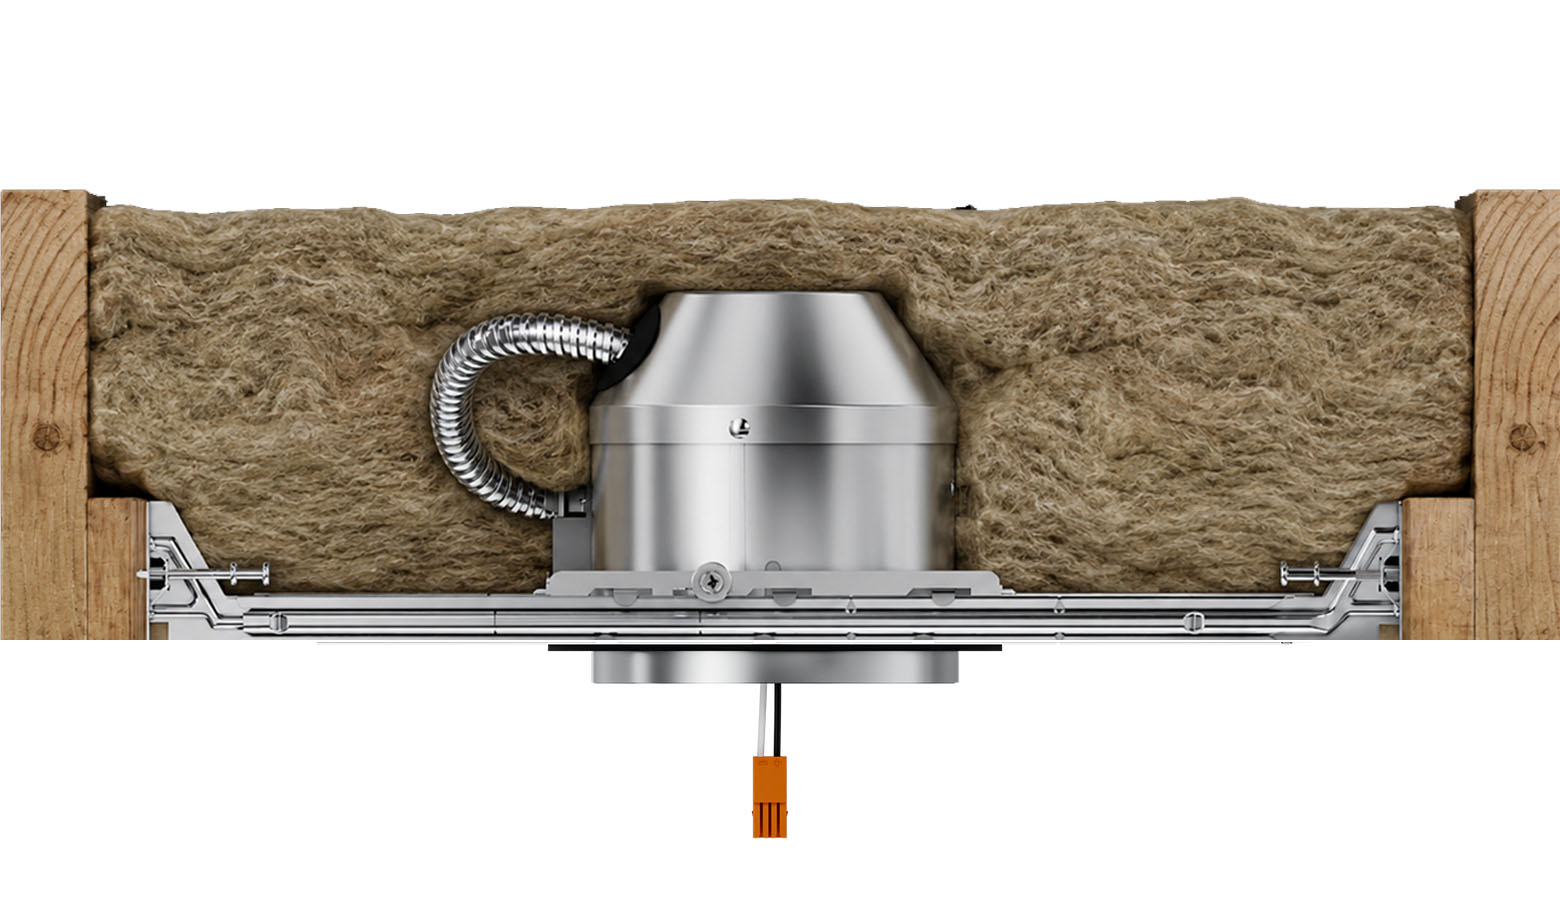
IC-Rated for Insulated Ceiling Applications
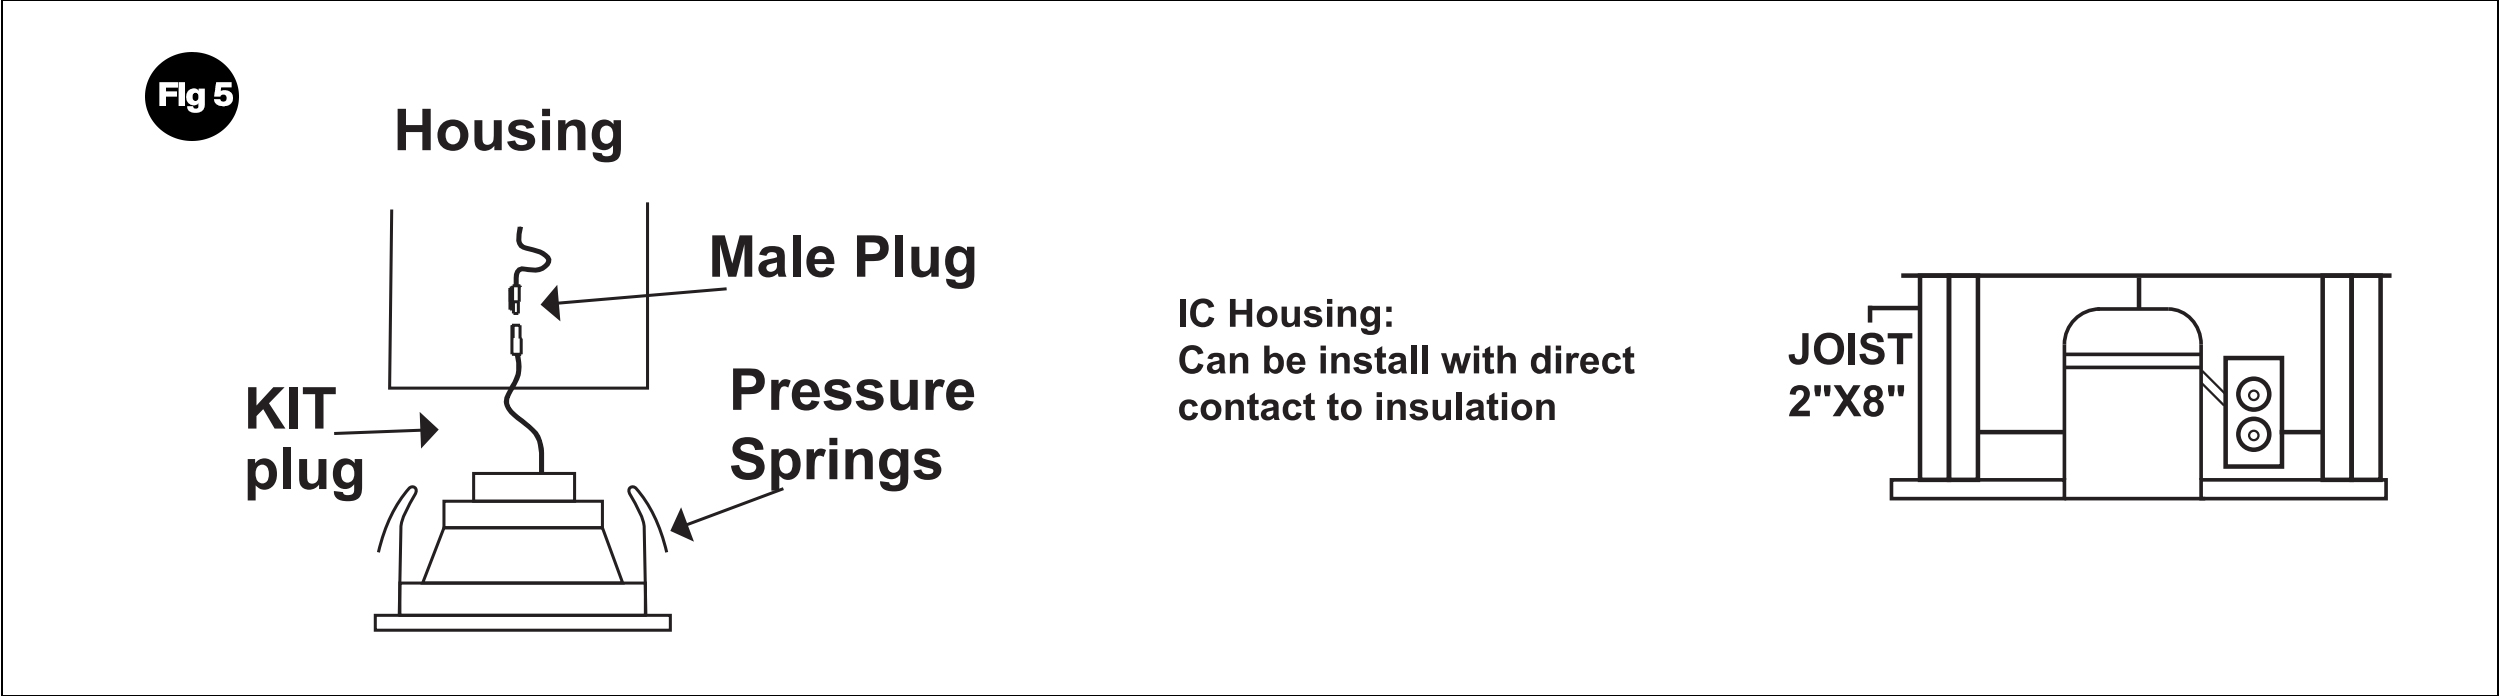
The IC-rated housing is designed for installation in insulated ceiling assemblies where the housing may contact insulation, when installed according to applicable electrical codes and project requirements. This feature gives contractors greater flexibility when planning recessed lighting in residential and commercial new construction spaces.
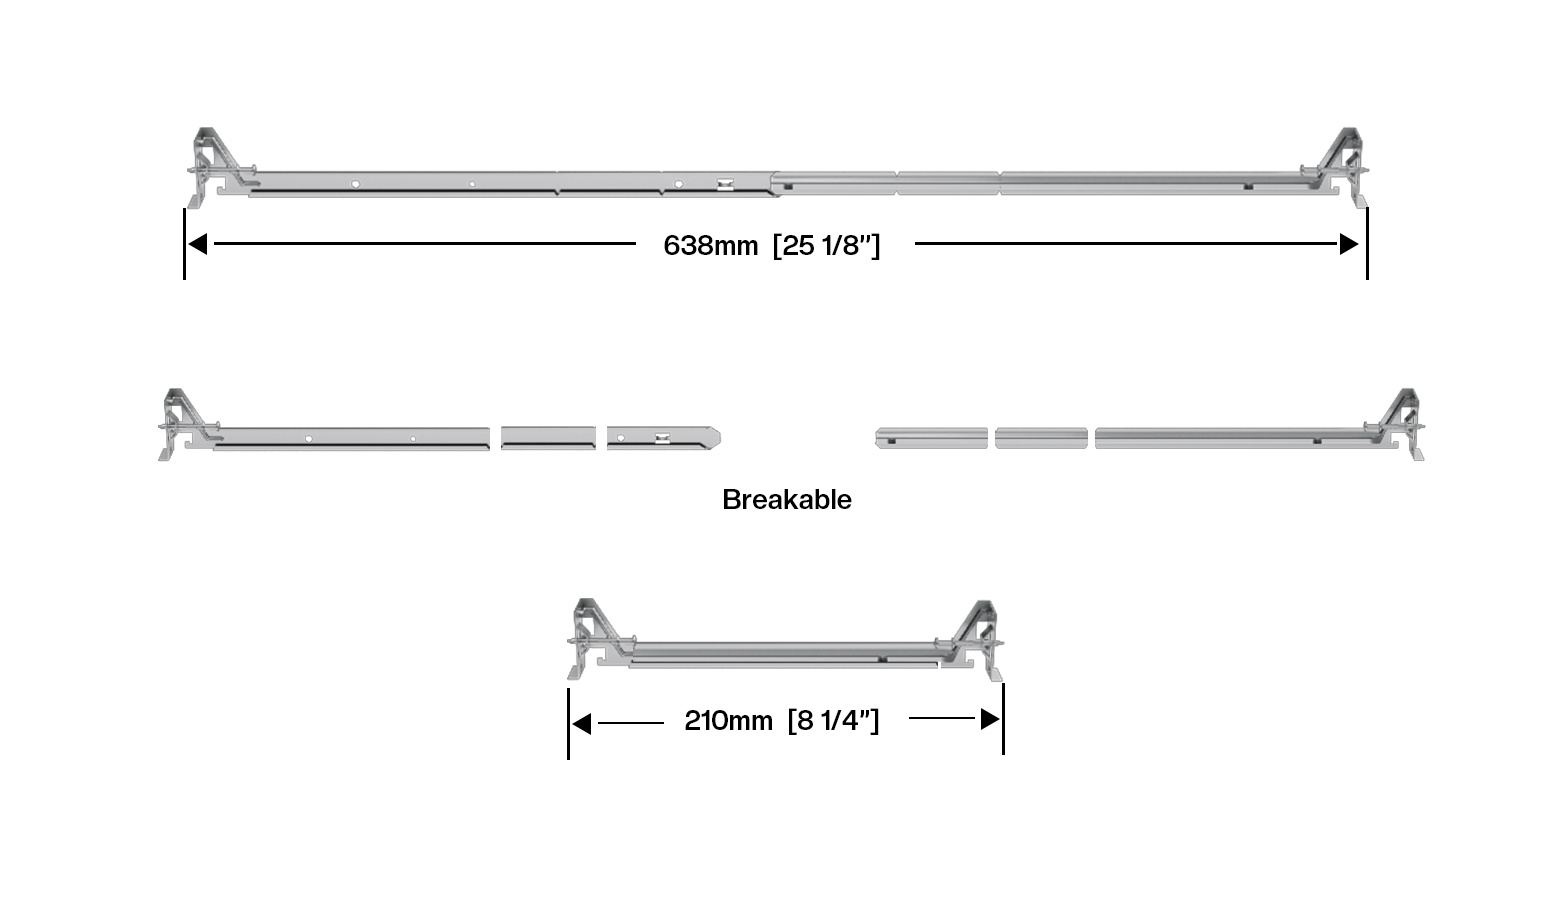
Adjustable Hanger Bars
Adjustable or breakaway design to fit different installation distances. The Hanger Bars can beadjusted according toneeds: 8 1/4"- 25 1/8".
A:It is designed for 4-inch recessed lighting installations in new construction ceiling applications.
A:The housing supports a 120V–277V voltage range.
A:Yes, it is IC-rated for insulated ceiling applications when installed according to applicable codes and requirements.
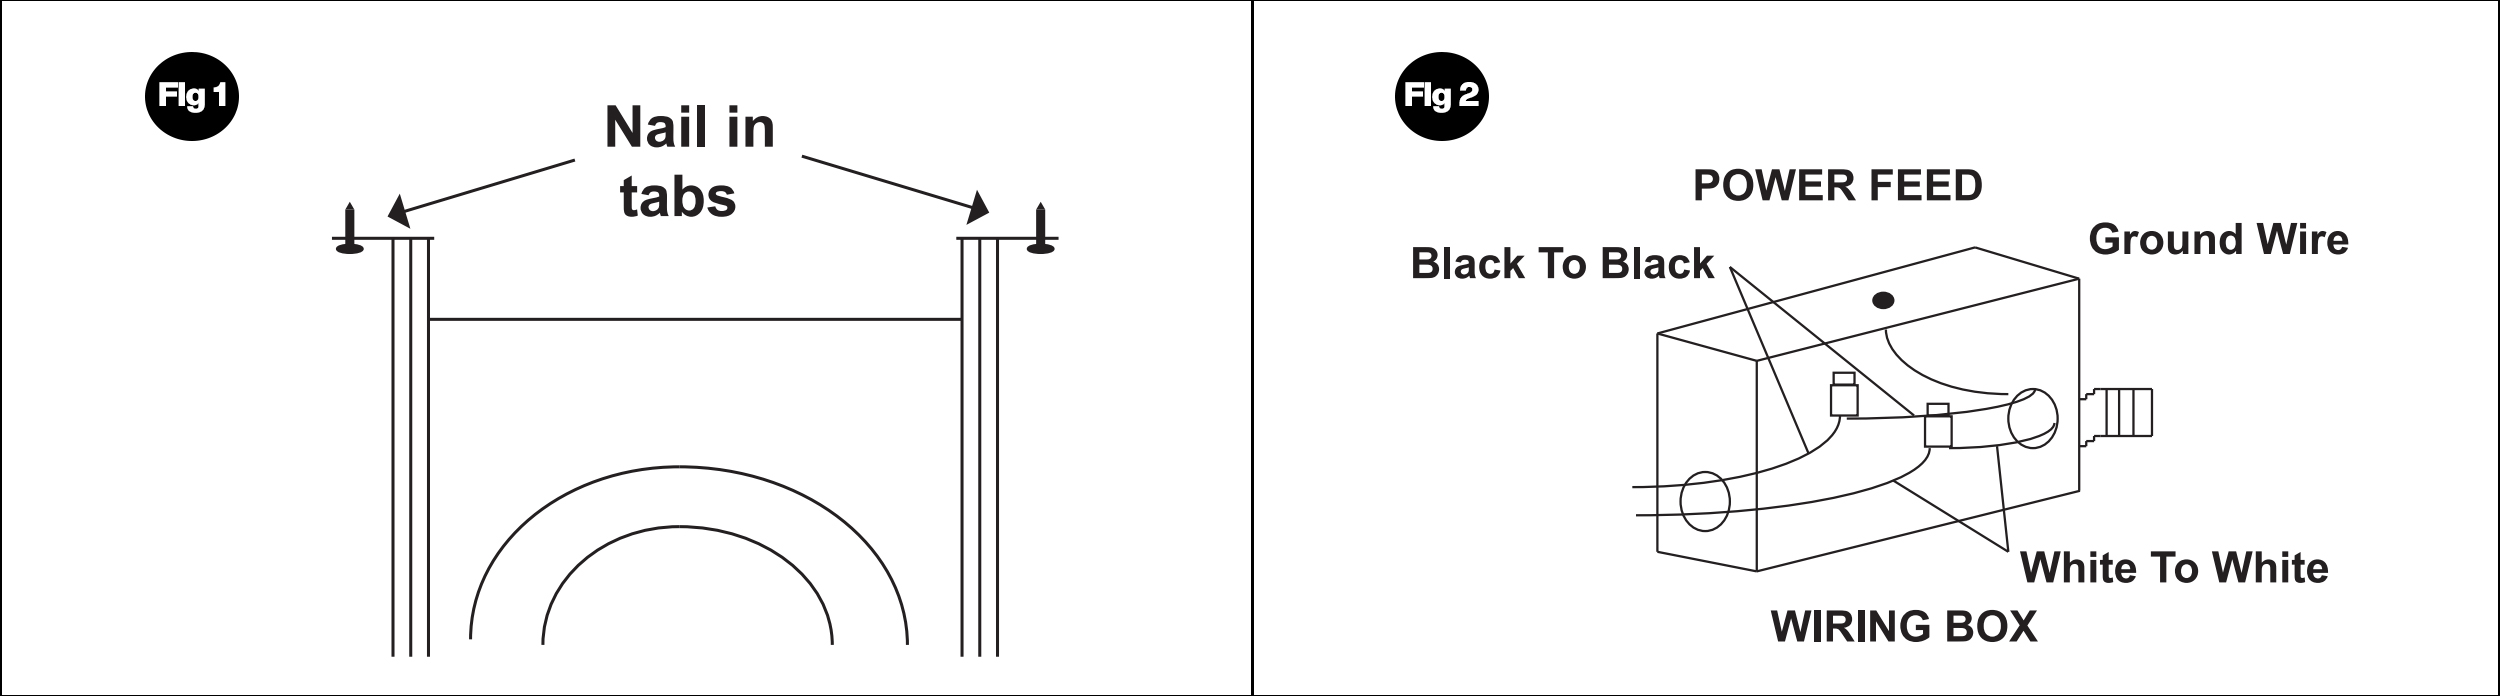
1. Install hanger bars to fixture be sure end tab is facing outward. (FLG 1)
2. Junction box contains three wires a black (hot) white (neutral) and bare ground. MAKE SURE TO CONNECT WHITE TO WHITE ANDCOLORED OR BLACK TO BLACK (FIG.2)
After completing the wiring. (being make sure sure the wires are placed with wiring box)snap wiring box cover closed.
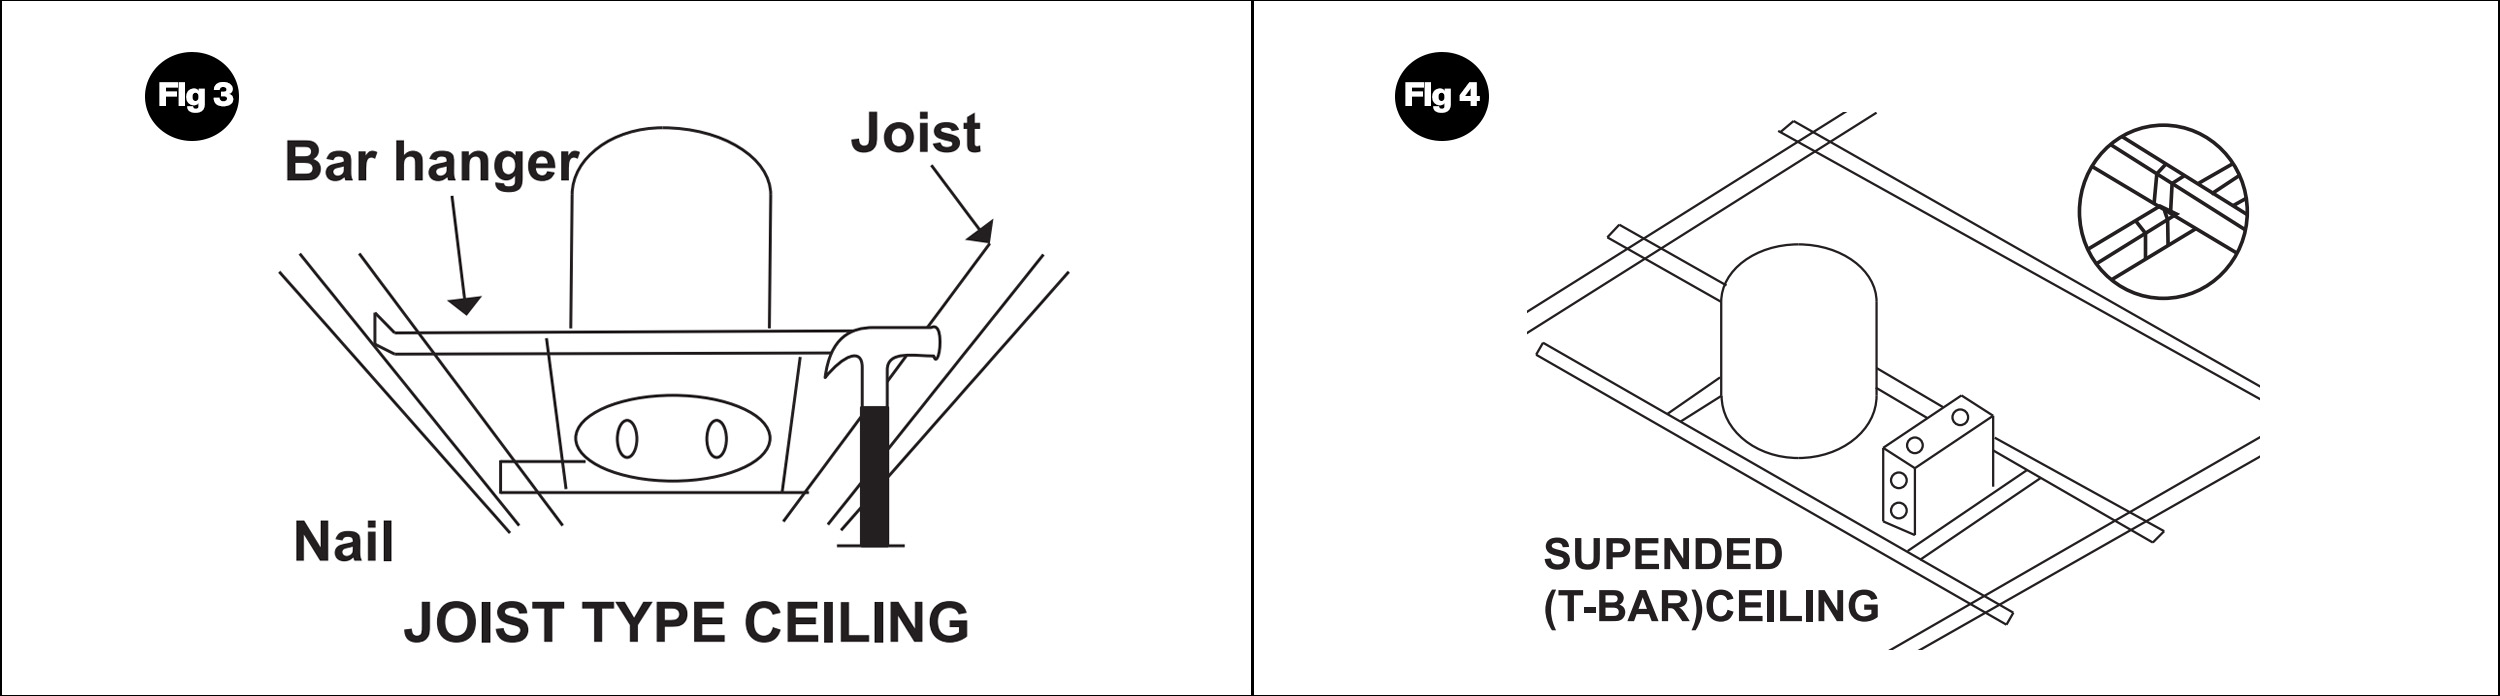
3. Joists Type Ceilings: Extend bar hangers to fit between joist and position fixture and hammer nail on bars into the joists. Make sure the hanger is leveled with bottom of joists. (FIG.3)
4. T-bar Type Ceiling:Extend bar hangers 1" past T-bars then rest fixture on t-bars.Secure fixture to t-bars with wire see.(FIG.4)
5. Plug in trim kit to can, insert trim into housing pushupward fully and pressure springs will hold trim in place. (FIG.5)
leave a message
Scan To Wechat :

Scan To WhatsApp :

Home
Products
contact